Bookings with Me Options
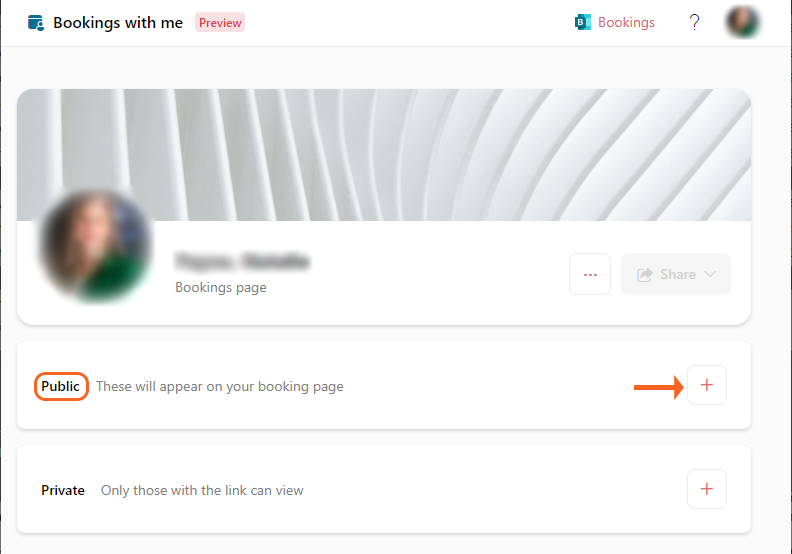
To get started and manage Bookings with me, visit outook.office.com/bookwithme and log in with your SHSU credentials if needed. The link that allows others to book the time with you will need to be created first.
-
Creating Meeting Invite
The link that allows others to book the time with you will need to be created first. To do that, select the plus (+) sign in the Public section of the Bookings with me homepage.
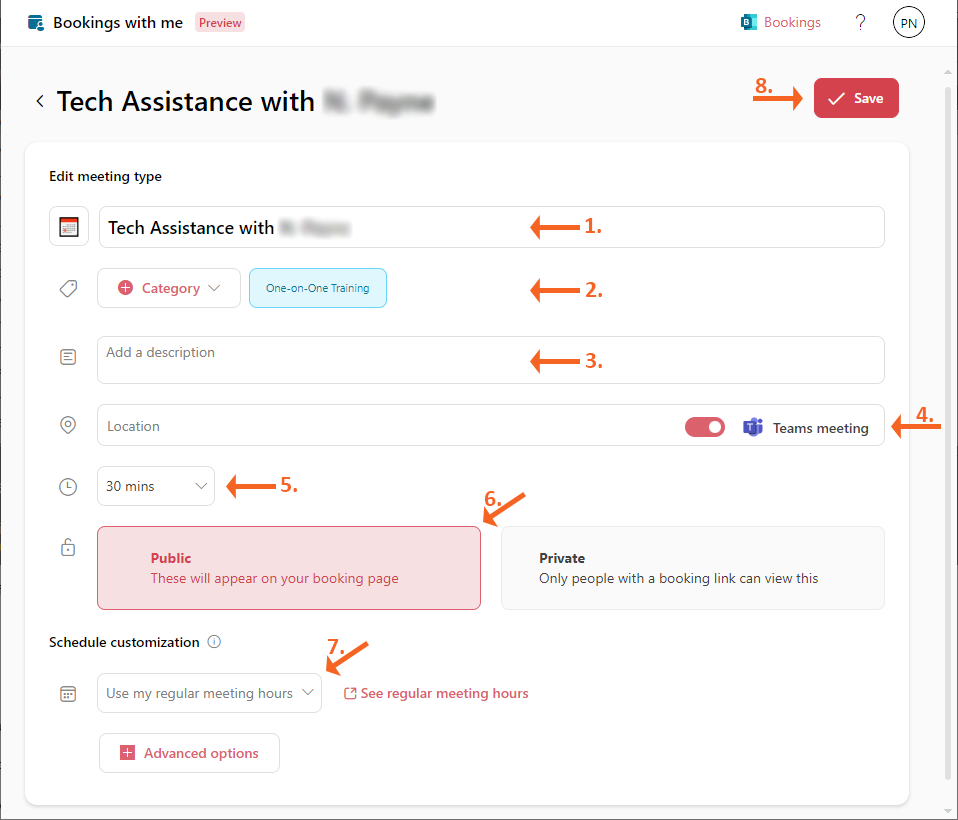
Next, you will set up the options for the meetings others can create with you.
- The name of the meeting
- The meeting category (if necessary)
- Additional details or a description of the meeting
- Location of the meeting. Can be a physical location or a Teams meeting
- The length of the meeting
- Ensure Public is selected so anyone can schedule a meeting with you
- Uses your meeting hours with availability as the meeting options (you can also customize these hours)
- Once all options are selected, click Save.
-
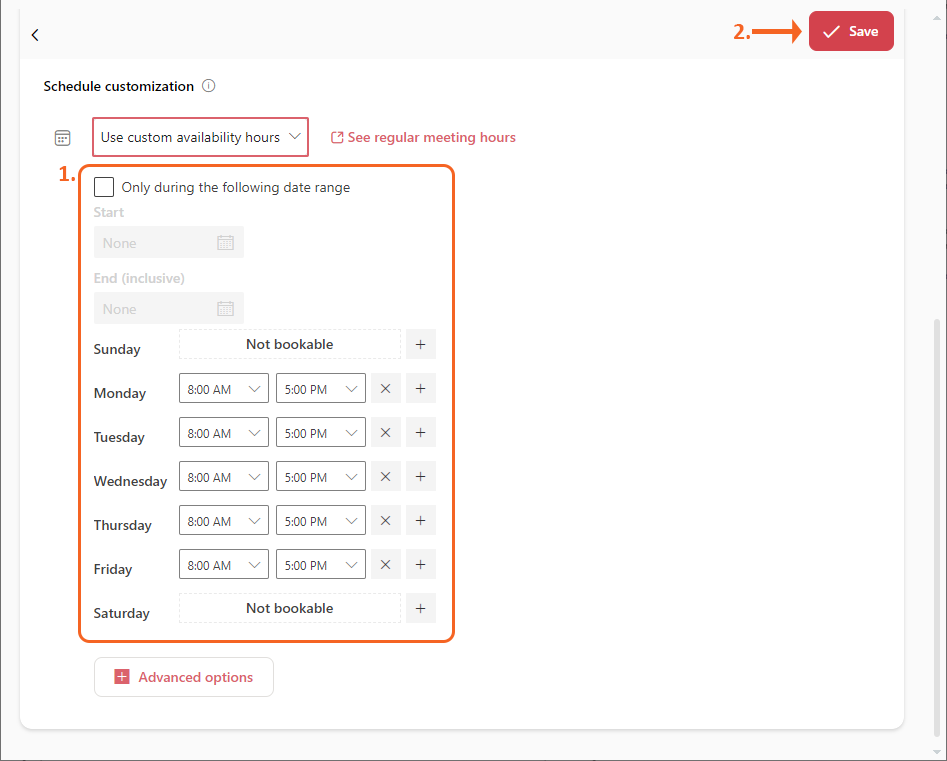
Setting Custom Hours for Meeting Invite
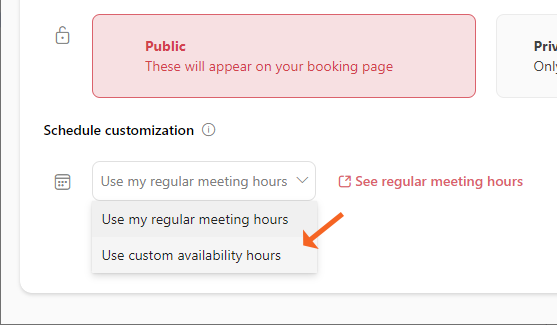
By default, Bookings with me uses available times in your Outlook calendar for meeting options. You can set custom availability hours instead by selecting Use custom availability hours in the Schedule customization section.
In the Schedule customization options,
- Select the date range (if desired), then set the hours for each day of the week you would be available for others to create meetings with you.
- Once the times are set, select Save.
-
Advanced Options
To view additional options for Bookings with me, select Advanced options.
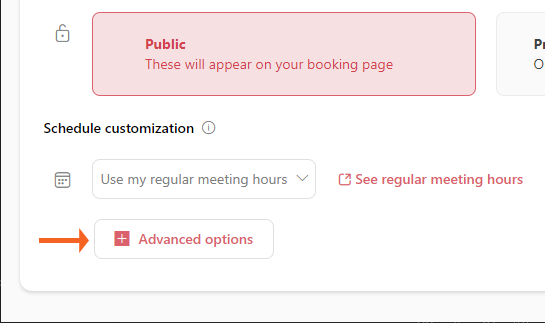
In advanced options, you can set
- Buffer time before meeting – time before the meeting would begin to get ready or get to the location of the meeting if not online
- Buffer time after meeting – time after the meeting to wrap up or get back to your office if the meeting was not online.
- Limit start time to – the meeting length can be limited
- Minimum lead time – how long before the meeting time could others schedule a meeting with you
- Maximum lead time – how far out others can schedule a meeting with you.
- Once all options are set, select Save.

-
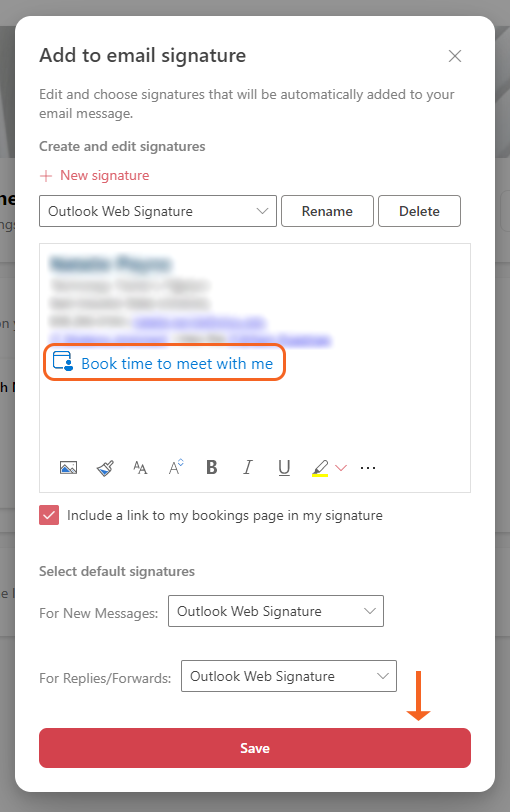
Add Link to Email Signature
Once all options for meetings are created, you can add a link in your email signature to provide people a way to schedule a meeting with you. To get started,
- Select Share on the Booking with me home page
- Select Add to email signature
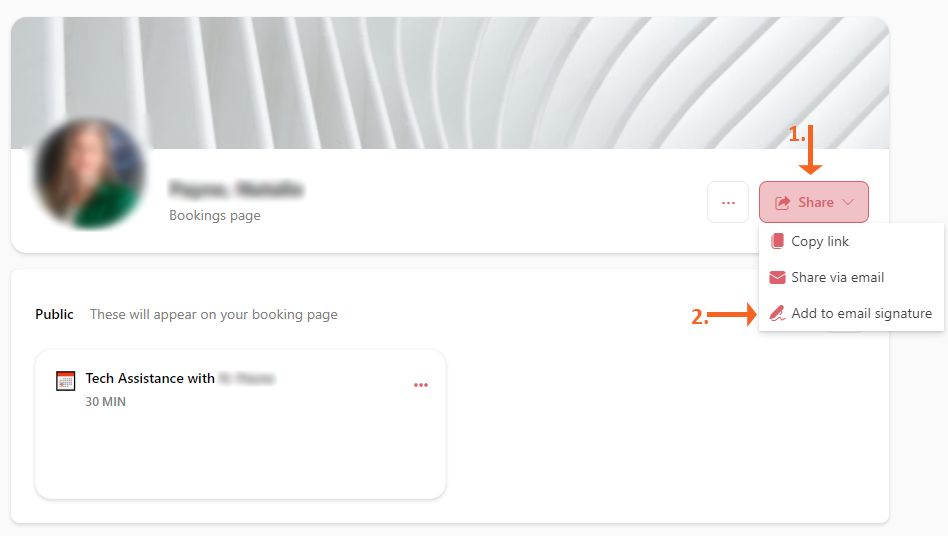
A Book time to meet with me link will be added to your email signature. When you send an email, others can click that link to schedule a meeting with you in the dates and time frames you created.