
Milestone - Setting Up Your View
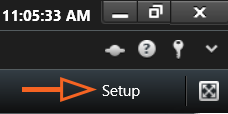
When you get access to a particular set of cameras on campus, you will need to set up your view. To do this, select Setup in the right side of the screen.
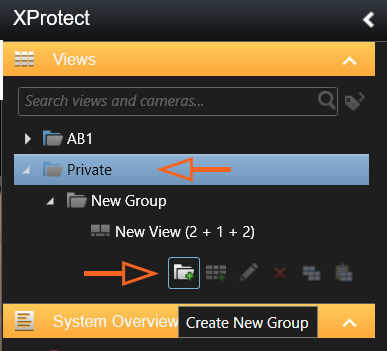
The first section on the left hand side is called the Views section. It has a list of the areas you have access to and a Private folder. Once you select the Private folder, select the Create New Group option.
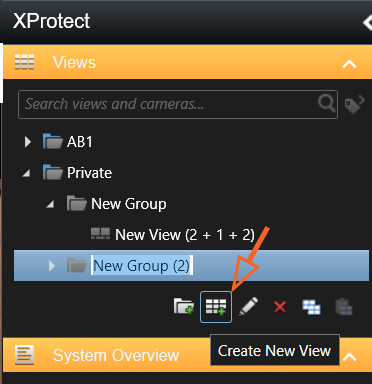
Once you do this, new options become available. You can:
- Create a New View
- Rename the Folder
- Delete the Folder
Click the Create New View button.
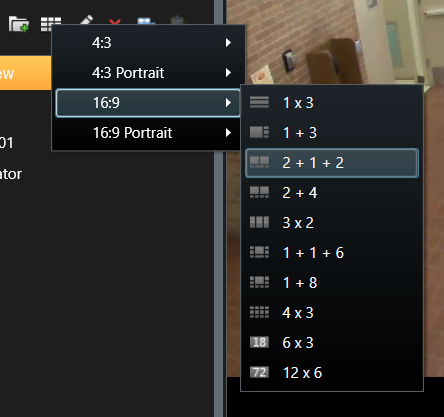
You will now need to choose the layout for your cameras. You have the option of using the following aspect ratios:
- 4:3
- 4:3 Portrait
- 16:9
- 16:9 Portrait
If you have a square computer monitor, the 4:3 ratio will work best. If your monitor is more rectangular, the 16:9 ratio is for you.
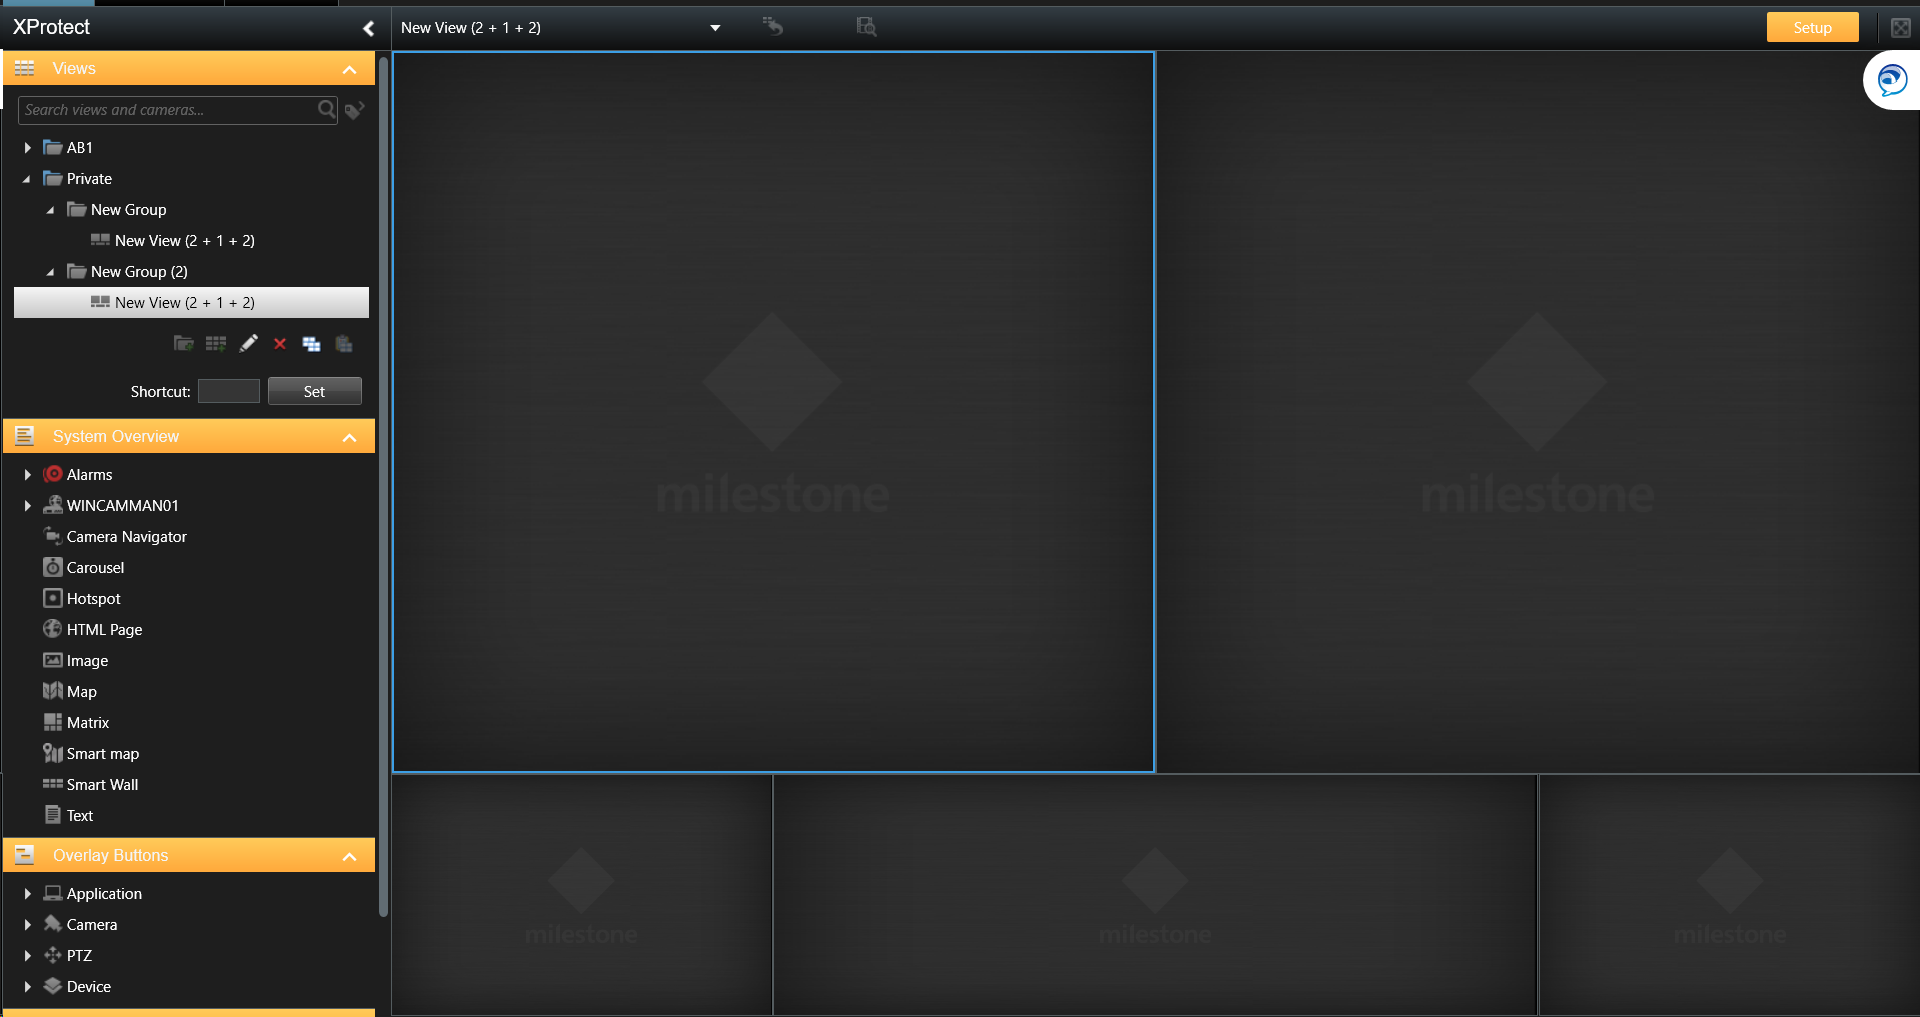
Select the layout that works best for you. In this example, we will select a 16:9 aspect ratio with a 2+1+2 view.
Once you select the view you want you will see placeholders in the larger area of the screen (as seen below).
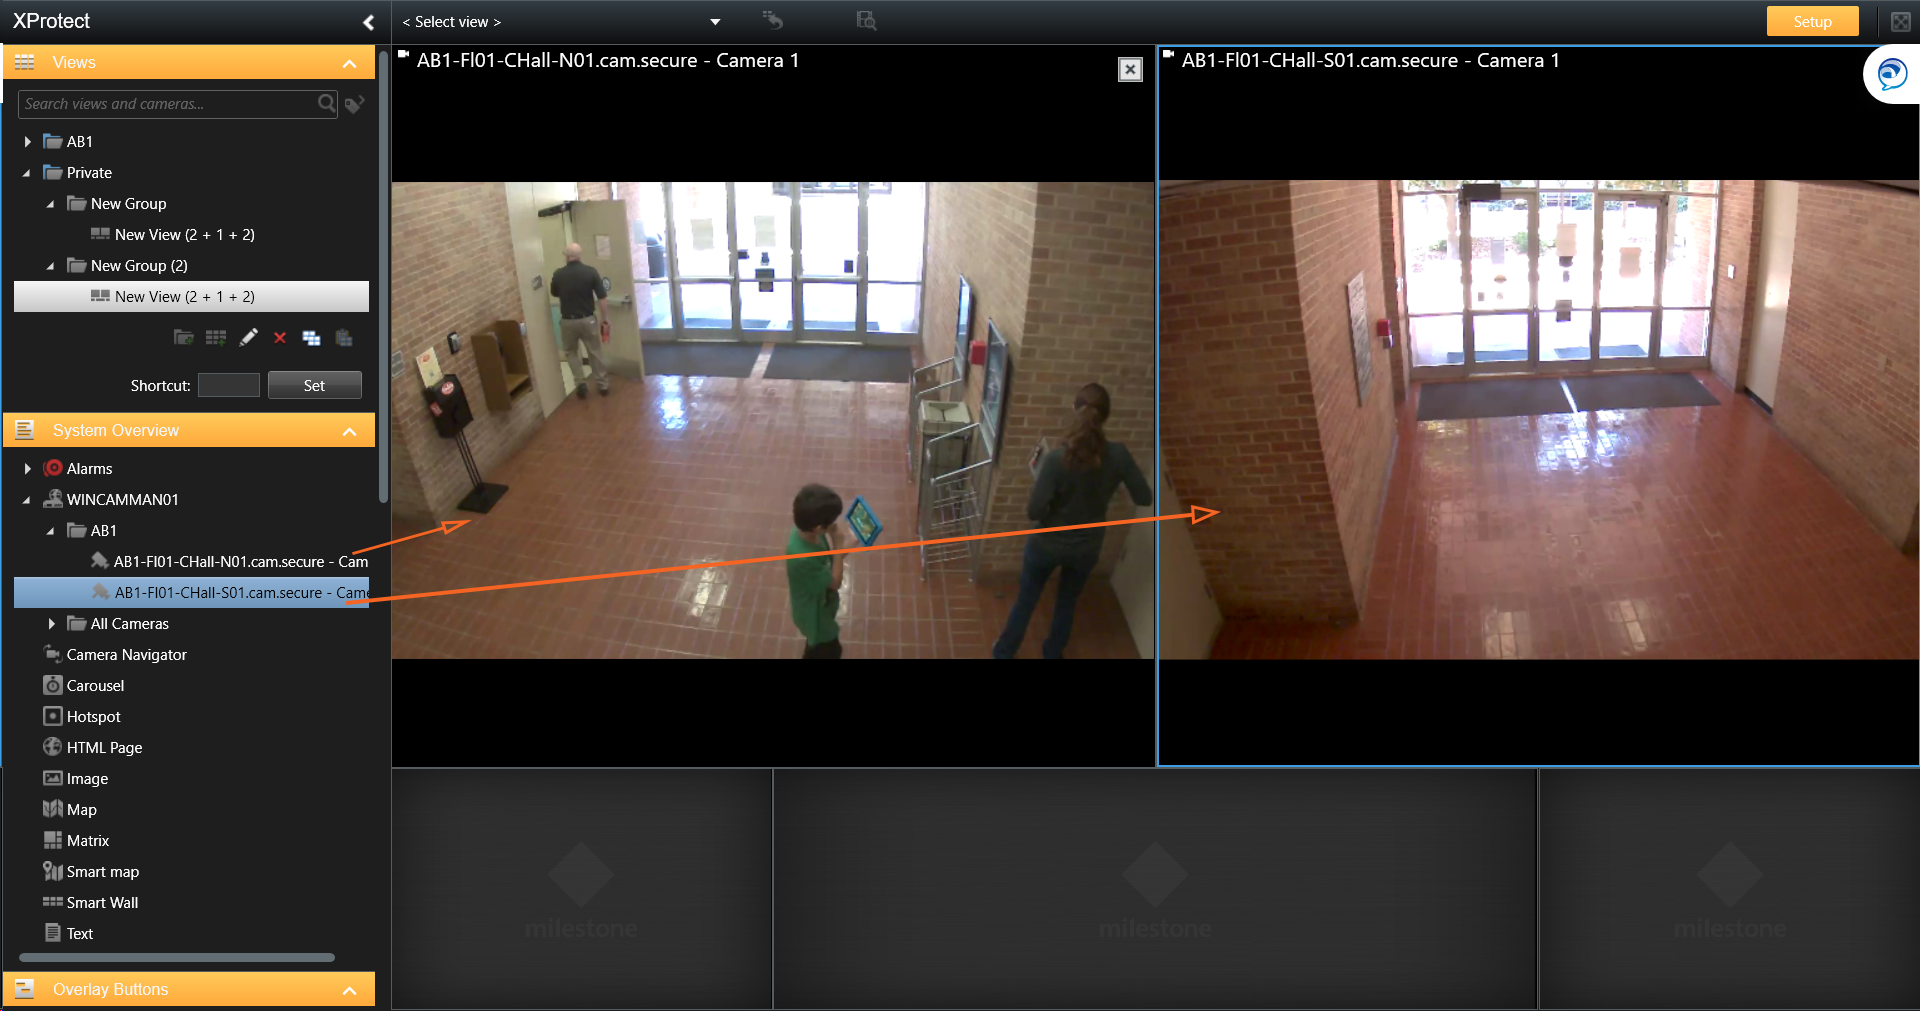
Drag and drop cameras onto your screen:
- Go to the System Overview section underneath the Views section
- Select the WINCAMMAN01 folder
- Find the area/building folder
- Drag and drop the individual cameras to the placeholders
Once you do this, you are all set up!
You can now de-select the Setup option to see what is happening Live on your cameras.