
Add Network Printers (Windows 10)
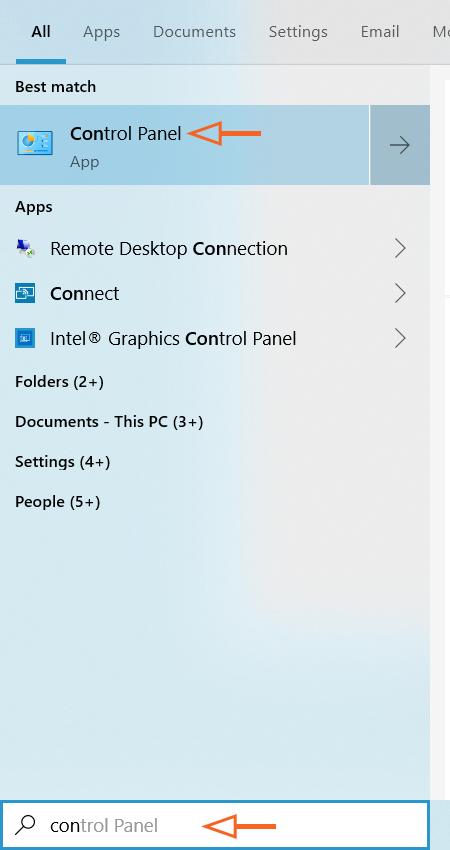
First, search for Control Panel in the Taskbar Search bar. Select Control Panel.
(Please note: If you do not have the search bar visible, you will need to click the magnifying glass icon ![]() first to display it.)
first to display it.)
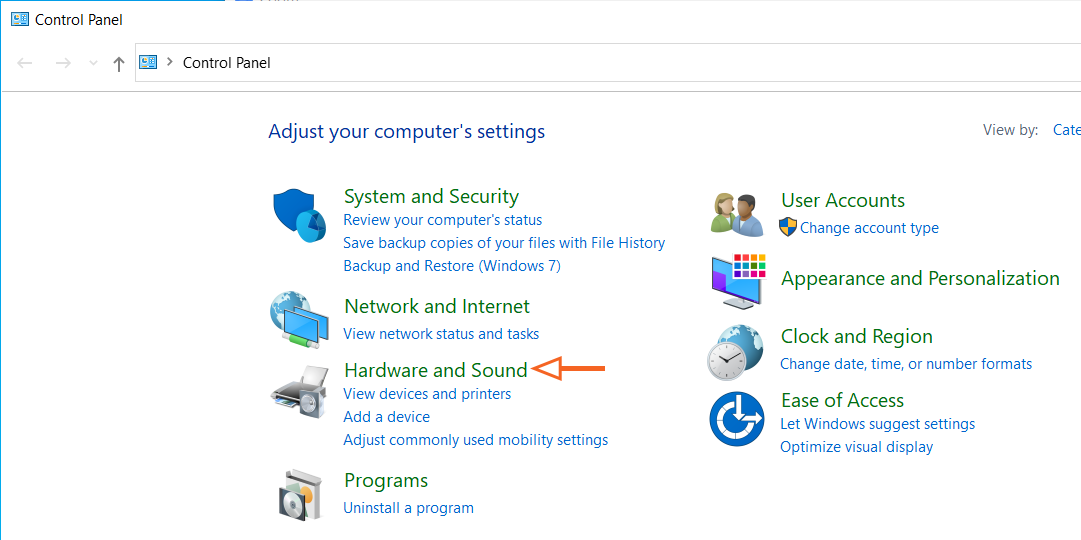
In the Control Panel, select Hardware and Sound.
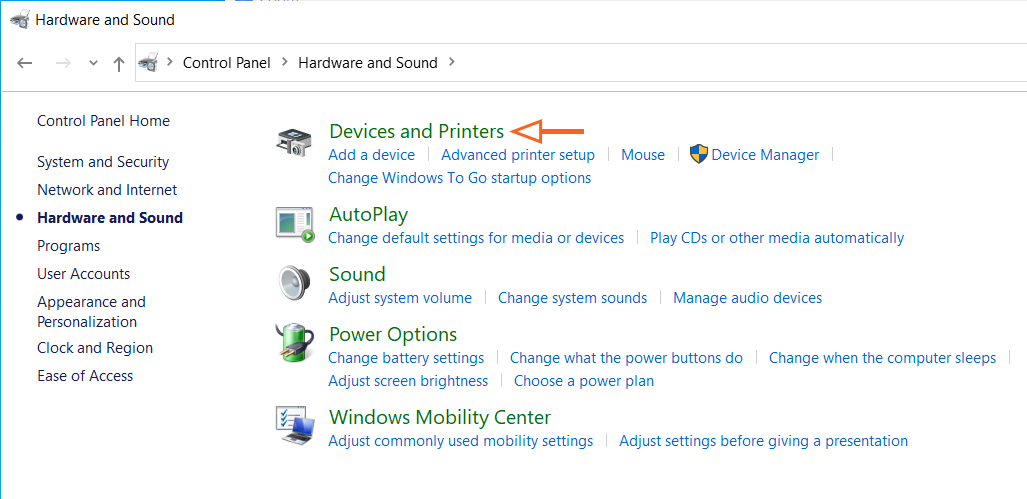
In Hardware and Sound, select Devices and Printers.
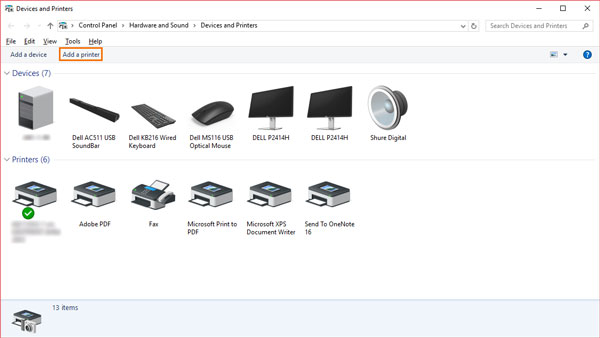
In Devices and Printers, select Add Printer.
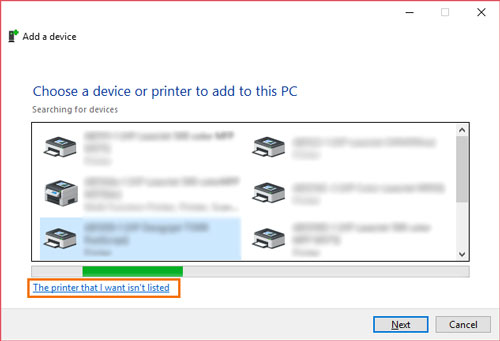
In the Add a device window, select The printer that I want isn't listed.
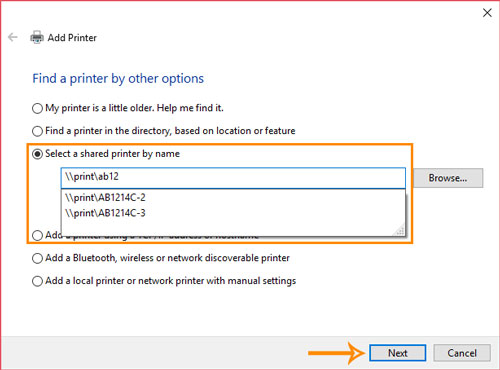
In the Add Printer dialogue box, select the button for Select a shared printer by name. Type the server and printer name in the box. The name of the printer should be on a white sticker on the printer. The server and printer name will look similar to \\print\printername. Once printer is located in the list, select Next.
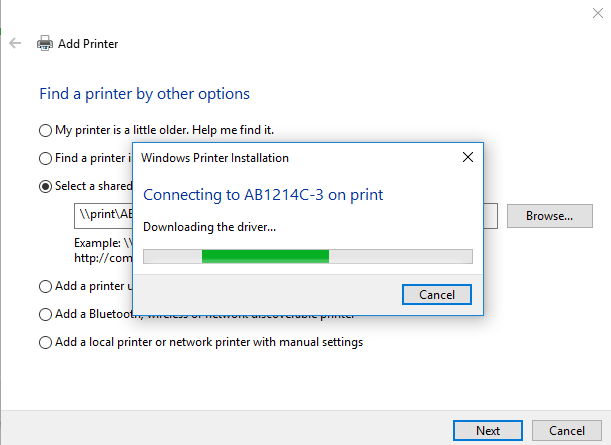
If there are no issues, the computer will connect to the printer.
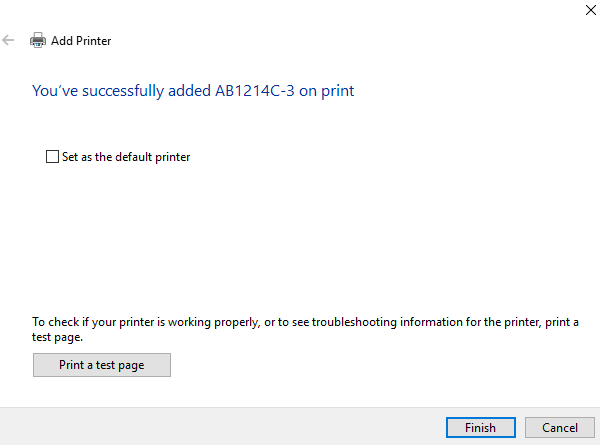
Once the computer connects with the printer, the following will display.
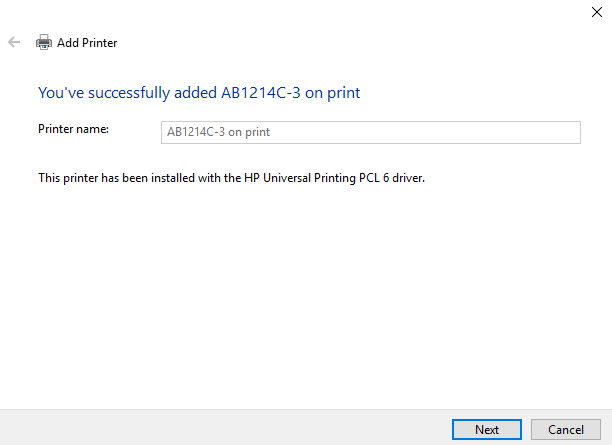
The newly added printer can then be set as the default printer if needed.
This video will walk you through the steps as well.